Inspection Case
MIV-X
MAIVIS Ultrasonic Optical Flaw Detector
Make It Visible!
Visualizing Cracks, Voids, Delamination, and Other Hidden Defects Normally Impossible to Check Visually
Anyone Can Quickly and Easily Perform a
Visual Surface Inspection

Thanks to Shimadzu’s proprietary light imagining technique,
which combines an ultrasonic oscillator with a stroboscope,
defects near the surface of a material, including peeling of the bonding and adhesive surfaces of heterogeneous materials, as well as paint, thermal sprays, and coatings can be inspected easily and non-destructively.

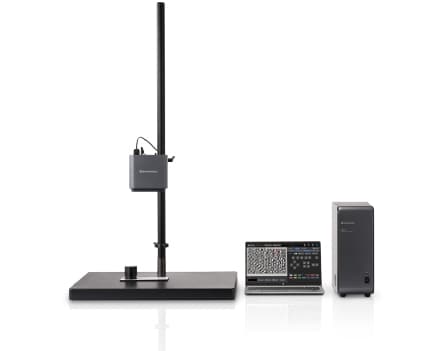
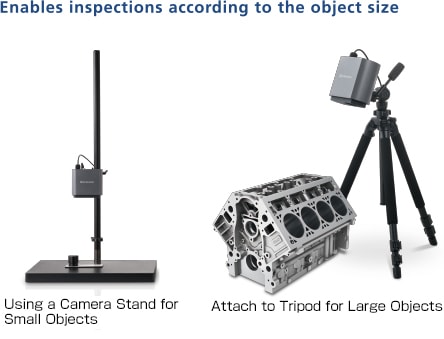
- Simply attach the ultrasonic oscillator to the sample, and position the camera above the inspection surface.
- The propagation of the ultrasound is quickly displayed, and flaws are easily identified from the video.
- The easy-to-operate software is enhanced with functions to mark the flaws and measure the size easily.
- The lineup includes an optional optical zoom set, which can detect smaller flaws.
Utilized in Various Industries

-
Ultrasonic optical flaw detection enables the visualization of internal flaws (at a depth of about 1 mm) that are hard to find using conventional ultrasonic testing. It can easily detect flaws in joints and bonding surfaces in research and development processes involving multi-materials, which are created by combining different materials to increase strength and reduce weight.

Inspection Result Screen
Features
-
With ultrasonic optical flaw detection technology, the sample is encouraged the displacement of the surface is detected optically, and the propagation of the ultrasonic wave on the surface is observed.
-
The MIV-X Ultrasonic Optical Flaw Detector assists with regions where ultrasonic testing (UT) is difficult. Leave the non-destructive inspection of surfaces and near surfaces to MIV-X!
-
The instrument is equipped with a function to digitally remove noise in the window showing the propagation of the ultrasound, simplifying flaw identification.
-
The instrument is equipped with a user interface that simplifies operations, such as displaying a scale (ruler) on acquired images of cracks and peeling and measuring the distance between two selected points.
-
Decreases the minimum detection size by a factor of approximately two (MIV-X standard: From approximately 1 mm dia. to 0.5 mm dia.)
Laser optical axis adjustment is also possible, improving irradiation uniformity
Videos
-
MIV-X: Ultrasonic Optical Flaw Detector
-
MIV-X: Inspection Procedure in 4 Steps
-
Multifaceted Evaluation of High-Tensile Strength Joints b/w Dissimilar GA Steel & Al Sheet Materials
This video shows examples and effectiveness of multifaceted evaluation of joint of dissimilar materials with ultrasonic optical defect detector, X-ray CT system, electron probe microanalyzer (EPMA), and precision universal testing machine.
News / Events
-
AUTOGRAGH AGS-X2 Series has been released
The Shimadzu AUTOGRAPH AGS-X2 series provides superior performance and practical testing solutions for a wide array of applications. Offering high-level control and intuitive operation, the AGS-X2 series sets a new standard for strength evaluations while providing the utmost in safety considerations in a modern, stylish design.
-
AUTOGRAGH AGS-V Series has been released
Shimadzu Corporation released the Autograph AGS-V Series precision universal testing machine. In this series, the range over which the force measurement accuracy is guaranteed has been increased by a factor of two compared with existing machines. As a result of this new function, the work required to change force measurement sensors and accessories required for measurement can be reduced.
-
High-Speed Video Camera HyperVision HPV-X3 has been released
Recording speed of 20 million frames/second, the highest in its class provides larger, clearer, high-sensitivity recording. HPV-X3 is equipped with a synchronized recording function and high-level analytical capabilities that accommodate a variety of software programs.
-
New Video: AUTOGRAPH AGX-V2 Voice Operation Device XV-Talk
We will introduce how XV-Talk, the world's first voice control device installed in Shimadzu's latest tensile tester AGX-V2, can be used in various scenarios.
-
New Video: AUTOGRAPH AGX-V2 Operation Control Panel Stand-alone test feature
We will introduce a new feature of Shimadzu's latest tensile tester, AGX-V2, a stand-alone testing function using a large color LCD touch panel.
-
New Autograph AGX-V2 Series Precision Universal Testing Machines
The World’s First Testing Machines Equipped with a Voice Operation Device


