SPM-9700HT Plus - Features
Scanning Probe Microscope/Atomic Force Microscope
-
Nano 3D Mapping Fast
-
NanoAssist Optimizes Observation Conditions
-
High-Throughput Scanner Shortens Observation Times
-
High Stability & High Throughput
-
Cantilever Mounting Jig
-
Wide Variety of 3D Rendering Functions Using Mouse Operations
-
Functionality and Expandability to Meet a Wide Range of Requirements
Nano 3D Mapping Fast
-
The time required for physical property mapping has been significantly reduced compared to the previous machine (SPM-9700HT).
The shorter mapping time enables stable physical property evaluation. 
NanoAssist Optimizes Observation Conditions
High-Throughput Scanner Shortens Observation Times
- The newly developed HT scanner with its high-speed response and optimized software and control system design, enables image data to be acquired five times faster than before (compared to our previous system).

HT scanner
Maximum scanning range (X, Y, Z):
10 μm × 10 μm × 1 μm
High Stability & High Throughput
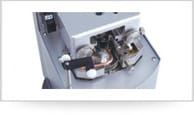
With the optical lever system and cantilever integrated into the head, samples can be replaced by simply sliding the head. Since samples can be changed without shutting off the laser beam, laser irradiation characteristics remain highly stable even after changing the sample. This eliminates the need to readjust the optical axis or other parameters associated with stopping the laser, which means analysis times can be shortened.
-
High Stability
- The laser remains stable and irradiating the cantilever even while replacing samples.
- Design is resistant to vibration, noise, wind, and other external disturbances, so a specialized enclosure is not necessary.
- The main unit includes a built-in vibration isolator.
-
High-Throughput Observations

- Samples can be replaced without removing the cantilever holder.
- Samples can be accessed even during SPM observations.
- Samples are approached automatically, regardless of the sample thickness.
Secret to the High Throughput of the SPM-9700HT Plus
Remarkable Mechanism Optimized for Ease of Operation
-Comparison of Throughput for Differences in Replacing Samples-
| SPM-9700HT Plus |  |
|---|---|
| System Without Head-Slide Mechanism (one example) |  |
Cantilever Mounting Jig
- This jig ensures easy and secure mounting of the cantilever.
Mounting procedure:
(1) Set the cantilever holder in the cantilever mounting jig.
(2) Place the cantilever on the slide.
(3) Slide the the cantilever onto the cantilever holder, and secure it.
Wide Variety of 3D Rendering Functions Using Mouse Operations
Images can be freely rotated, zoomed, and Z-axis magnification varied using the mouse to intuitively adjust the viewing angle or magnification level. Using sophisticated analytical tools, such as a texture function, which displays sample physical properties overlaid with height information, or a 3D cross-section profile analysis function, dramatically improves the efficiency of image verification work.

Zoom

Rotation

Change Z-Axis Magnification

Texture Function
- Height information can be displayed overlaid with information about other physical properties. This allows clearly showing the relationship between both parameters.

3D Cross-Section Profile Analysis
- Cross-section profiles can be analyzed in 3D images. If physical property information is expressed in terms of texture, respective cross-section profiles can be displayed and analyzed in the same location.

Functionality and Expandability to Meet a Wide Range of Requirements
- A generous selection of measurement modes and excellent expandability helps ensure reliable measurements, regardless of the properties that a wide variety of samples may have, such as hardness or electrical conductivity.

With a generous selection of measurement modes, images can be obtained that show other information besides the sample shape, such as electrical current or electrical potential levels, or surface hardness or viscosity properties.
Standard specification

Contact Mode

Dynamic Mode

Phase Mode

Lateral Force Mode (LFM)
Optional Functions

Force Modulation Mode
Standard specification

Nano 3D Mapping Fast
Optional Functions

Current Mode

Surface Potential Mode (KPFM)
Optional Functions

Magnetic Force Mode (MFM)

Vector Scanning (special order)

Petri Dish Type Solution Cell (special order)

Electrochemical Solution Cell

Nano 3D Mapping Fast
A force curve can be measured for each point in observed image data to observe a distribution of sample mechanical properties or adhesive strength.

Sample Heating Unit
The sample can be loaded into the unit and heated.

Light Irradiation Unit
This unit enables the use of a ber optic light to irradiate sample surfaces. It does not include the light source or the optical ber.
SPM-9700HT, Nano 3D Mapping, the HT logo, SPM-Nanoa, and Ai Support are trademarks of Shimadzu Corporation or its affiliated companies in Japan and/or other countries.


